![]()
Docker is an open platform for developers and sysadmins to build, ship, and run distributed applications, whether on laptops, data center VMs, or the cloud. To know about Docker in details, click here. The installation and configuration process is described in our different blog. Click here to access that.
Here at linuxnix.com, we have a list of activities to be performed in this Docker series. With these tasks, we will be getting a clear picture on docker day-to-day use and the real-time scenarios we face where we need Docker the most. The lists of the activities are mentioned below:
- Dockerize a 2-Tier Java application by creating a Docker Image.
- Push the same Docker Image to Docker Hub.
- Run a container based version of the Application Database using the Docker-Compose file.
- Ensure data persistence by mounting the data outside of the containers.
In this section, we are going to start the first task:
Dockerize a 2-Tier Application by creating a Docker Image
2-Tier Java Project using Docker
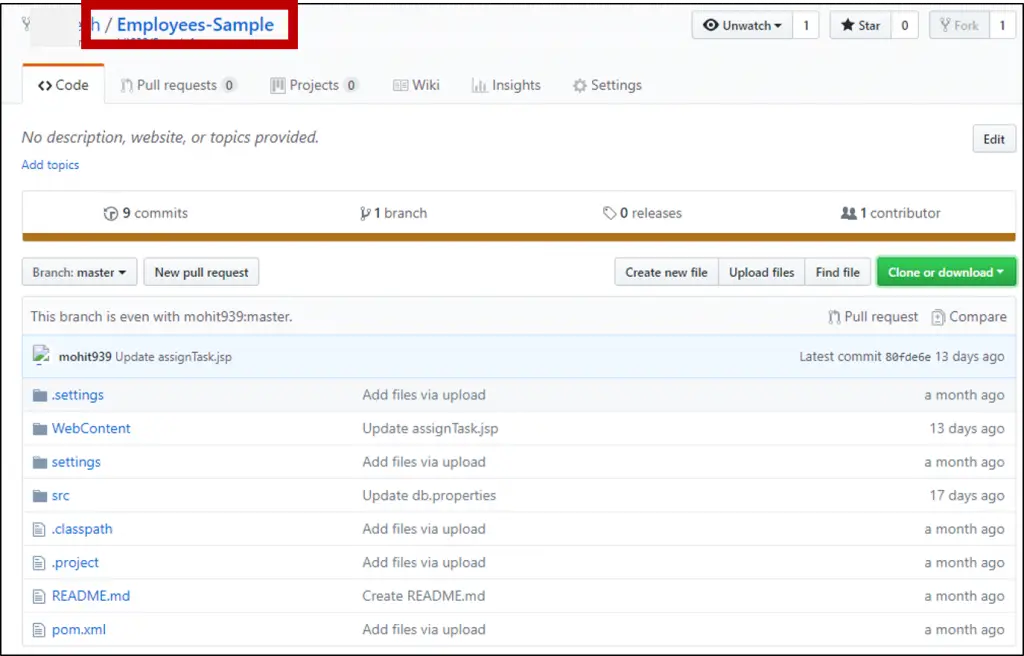
We can create a 2-tier Java project using Eclipse(or any IDE) or can clone any public project from any source code repository. Here we are cloning a Github repository where the application assigns tasks to the employee.
What is Dockerfile and how to Create it?
A Dockerfile is a text document that contains all the commands which assemble to create a Docker Image. Now we need to create a Dockerfile to containerize this application. Docker can build images by reading instruction from a Dockerfile.
Let’s start by creating a directory named “docker201” which will act as a Docker home directory.
mkdir docker201
cd docker201/
Now create a Dockerfile to write the configuration to build the container.
touch DockerfileThe content of the HOME directory is as follows.
ls
The content of the Dockerfile is displayed below using Linux vi editor.
vi Dockerfile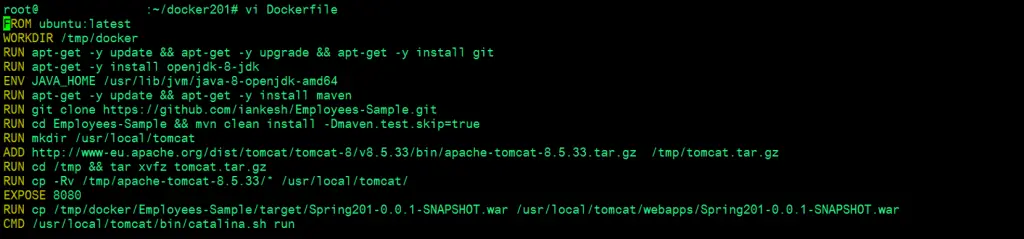
FROM ubuntu:latest
WORKDIR /tmp/docker
RUN apt-get -y update && apt-get -y upgrade && apt-get -y install git
RUN apt-get -y install openjdk-8-jdk
ENV JAVA_HOME /usr/lib/jvm/java-8-openjdk-amd64
RUN apt-get -y update && apt-get -y install maven
RUN git clone https://github.com/iankesh/Employees-Sample.git
RUN cd Employees-Sample && mvn clean install -Dmaven.test.skip=true
RUN mkdir /usr/local/tomcat
ADD http://www-eu.apache.org/dist/tomcat/tomcat-8/v8.5.33/bin/apache-tomcat-8.5.33.tar.gz  /tmp/tomcat.tar.gz
RUN cd /tmp && tar xvfz tomcat.tar.gz
RUN cp -Rv /tmp/apache-tomcat-8.5.33/* /usr/local/tomcat/
EXPOSE 8080
RUN cp /tmp/docker/Employees-Sample/target/Spring201-0.0.1-SNAPSHOT.war /usr/local/tomcat/webapps/Spring201-0.0.1-SNAPSHOT.war
CMD /usr/local/tomcat/bin/catalina.sh run
Let’s get into the docker file and understand each and every piece of it.
- FROM: This command pulls a public image from Docker Hub and get that added to the build. Here, in this case, it initializes an Ubuntu instance with the latest configuration.
- WORKDIR: This command sets the working directory for running all the commands from the Dockerfile.
- RUN: This command executes any command on the top of the image and commits the result.
- ENV: This command sets the home path of the different application. Here we are setting java path using this command.
- ADD: This commands copied new files, directories or downloads from remote URLs.
- EXPOSE: This command ensures the container that the application listens to the specific port at runtime.
- CMD: This command is used to provide defaults in running container. It must be used only once in the Dockerfile, if used more, only last CMD will come into effect.
There are many more attributes used in Dockerfile. To go with all of them, click here. Briefing this file, we are installing Ubuntu instance. Setting up the home directory and updating the machine. Next is installing Java, Maven and setting up its path. Later cloning the repository, building it and deploying it to Tomcat. Up next, exposing the application port and starting the Tomcat.
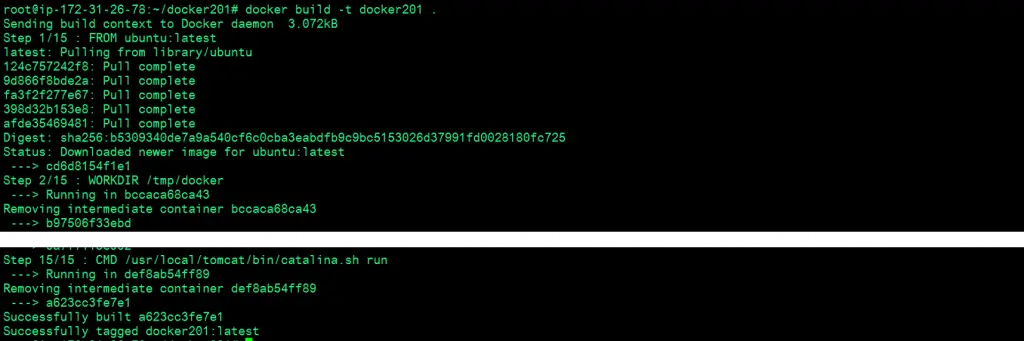
Building the Docker Image using Dockerfile
Once we have the Dockerfile with ourself, we will build Docker Image for the same. To build it, we use the below command.
docker build –t docker201 .Here “docker build” is the command to build docker image, “-t docker201” is the tag we assign to the image (here we assign docker201 as the tag) and “.” is the location of the directory of Dockerfile. We are at the current directory, so used this.
To check whether the docker image is created or not, we can use “docker images“. Here we can see that, there are two images ie. “docker201” and “ubuntu”. “docker201” is the image we created while building the Dockerfile and “ubuntu” is the image docker itself created while building the Dockerfile because we have mentioned “FROM ubuntu:latest” in the first line of Dockerfile for the base machine.
docker images
Running the Docker Container
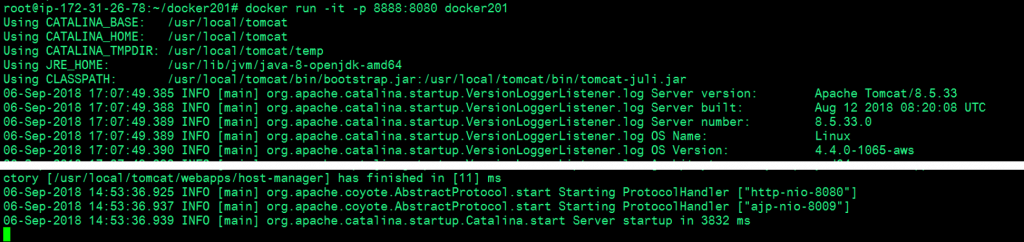
We have our image ready. Now, we will run this image to create a container and start it. The command used is mentioned below:
docker run -it -p 8888:8080 docker201Here “docker run” is the command to create and run a docker container, “-it” is the interactive mode of display, “-p 8888:8080” is used to expose the container port to the host port, here, in this case, we exported 8080 port of container to the 8888 port of the host machine and “docker201” is the image name created in the last step.
Once the container is up and running, it can be displayed with “docker ps“. “-a” is used to see all the container even if they are not up. Here, we can see the container is up and Container ID is displayed with the Image Name i.e. docker201 associated with it. We can even see the assignment of listening port form container to the host machine.
docker ps –a
Verifying the Container/Application
We have our container up and running and even we have masked the container 8080 application port to the 8888 port of the host. To verify it, we will try to open the application with the listening port of the host. The URL where the application is accessible would be:
http://<public-ip-of-host>:8080/<application-contextpath>
Our application is up..!!! We have successfully deployed a 2-Tier application via Docker. The next blog will focus on pushing the Docker Image to the Docker Hub. To go through it, click here.
Stay tuned for more updates @ linuxnix.com ..
Latest posts by Ankesh K (see all)
- Deep-Dive into Jenkins – What are all Jenkins functionalities ? - January 10, 2019
- What are different Maven Plugins and how to build a Maven project? - January 7, 2019
- What is a Maven POM File and what are different Maven Repositories? - January 3, 2019
- What is Maven and what are its benefits? - December 31, 2018
- What are the different ways to install Jenkins ? - December 27, 2018