![]()
Memcached is a distributed memory caching system. It caches data and objects in RAM in order to reduce the frequency of access to database or to an external API. Consequently, it helps to speed up dynamic websites.
The first release of memcached was in 2003.
Why?
To protect user data, sessions are stored in files on the servers themselves. This has several disadvantages:
- The user must be sticked to a front to maintain it’s session
- It generates a a lot of disk IO on servers
Using Memcached to store sessions:
- Removes the disk IO related sessions
- Allows not to stick a user to a server (and to complete round robin on a server pool)
Install & Tests
We need Apache running. Let’s say Apache is listening on 192.168.1.10
edit /var/www/php-info.php like below:
<?php
php phpinfo() ;
?>
The 2 packages that we need are :
- Memcached
- PHP5 memcache module
We can install them as follows:
apt-get install memcached php5-memcache
After the installation, memcached should already be running. You can check that by typing
server1:~# netstat -tap | grep memcached
tcp        0      0 *:11211                 *:*                     LISTEN     3053/memcached
By default, memcached is using port 11211 and is listening on all interfaces. So, to avoid that anyone (as memcached has no build-in authentication mechanisms) can connect to it and use it we have two solutions:
- Close port 11211 in your firewall.
- Configure memcached to listen only on localhost.
Here, I’ll use the second method.
Following are the steps:
- Edit /etc/memcached.conf
- Modify the list of the IP addresses to listen on (from all IP addresses to localhost address) by adding: -l 127.0.0.1 to the configuration.
You can also do (optional steps):
- Adjust the other settings in the memcached configuration (the file contains explanations for each setting).
- Make sure that memcached is listening on a firewalled interface (this is one of the only security measures taken by memcached).
Rerun netstat after restarting memcached:
/etc/init.d/memcached restart
netstat -tap | grep memcached
Memcached is now only listening on localhost:
server1:~# netstat -tap | grep memcached
tcp       0         0     localhost.localdo:11211         *:*           LISTEN    3092/memcached
Client session
We can use our script /var/www/php-info.php to know which php.ini is loaded
Edit the used php.ini and search for the ‘[Session]’ area as displayed below
[Session]
; Handler used to store/retrieve data.
; http://www.php.net/manual/en/session.configuration.php#ini.session.save-handler
session.save_handler = files
And change it to this:
[Session]
; Handler used to store/retrieve data.
; http://www.php.net/manual/en/session.configuration.php#ini.session.save-handler
session.save_handler = memcached
session.save_path = "127.0.0.1:11211"
Now, we have finished with the required changes and the session_handler is using memcached.
For multiple memcached servers listening on IP1, IP2 and IP3 :
[Session]
; Handler used to store/retrieve data.
; http://www.php.net/manual/en/session.configuration.php#ini.session.save-handler
session.save_handler = memcached
session.save_path = "tcp://IP1:11211, tcp://IP2:11211, tcp://IP3:11211"
Restarting Apache is mandatory in order that the new PHP configuration takes effect:
/etc/init.d/apache2 restart
Now, open php-info.php again in a browser: http://192.168.0.10/php-info.php
Search for memcache ans you should see it mentioned on the page. It is working as expected.
Simple application with memcached
Let’s use a simple PHP code to use memcached. Edit a new file /var/www/memcached.php
<?php
$memcache = new Memcache;
$memcache->connect('127.0.0.1', 11211) or die ("Could not connect to memcache instance");

$version = $memcache->getVersion();
echo "Server's version: ".$version."<br/>\n";

$tmp_object1 = new stdClass;
$tmp_object1->str_attr = 'test';
$tmp_object1->int_attr = 111;

$tmp_object2 = new stdClass;
$tmp_object2->str_attr = time();
$tmp_object2->int_attr = 222;

$tmp_object3 = new stdClass;
$tmp_object3->str_attr = 'never_expires';
$tmp_object3->int_attr = 333;

echo "Store data (key1) in the cache (data will expire in 60 seconds)<br/>\n";
$memcache->set('key1', $tmp_object1, false, 60) or die ("Failed to save data at the server");

echo "Store data (key2) in the cache (data will expire in 7200 seconds)<br/>\n";
$memcache->set('key2', $tmp_object2, false, 7200) or die ("Failed to save data at the server");

echo "Store data (key3) in the cache (data will never expire)<br/>\n";
$memcache->set('key3', $tmp_object3, false, 0) or die ("Failed to save data at the server");

$get_result = $memcache->get('key1');

echo "Data from the cache: key1 : <br/>\n";
var_dump($get_result);

$get_result = $memcache->get('key2');

echo "<br/>Data from the cache: key2 : <br/>\n";
var_dump($get_result);

$get_result = $memcache->get('key3');

echo "<br/>Data from the cache: key3 : <br/>\n";
var_dump($get_result);

?>
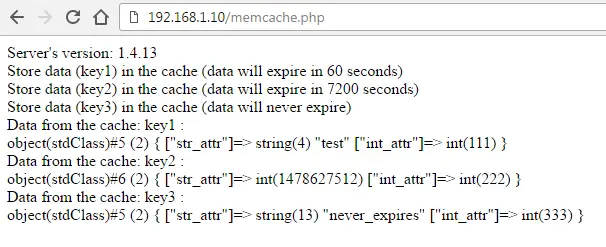
Call the php file in the browser and if all worked well we see :
What is next?
We will see in part II how to use memcached in command line.
Latest posts by ZIADI Mohamed Ali (see all)
- How to show mounted devices in Linux? - July 25, 2017
- How to use Positional parameters and special variables in Linux - June 28, 2017
- Linux: Connect to your WiFi network through CLI? - June 25, 2017
- How to find a file in Linux? - March 19, 2017
- Mysql: How to find table and database size? - January 9, 2017